So, now that the model of my face is coming along reasonably nicely. It's time to think about the rest of the head.
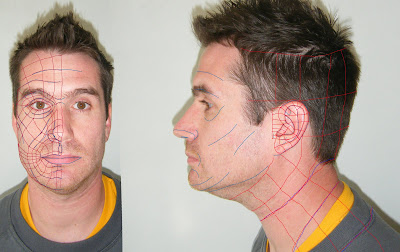
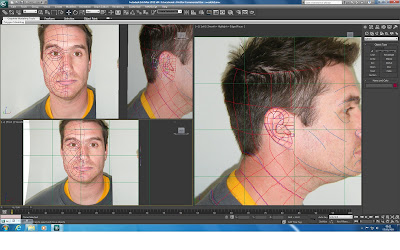
Firstly, I needed to go back to photoshop and create my topology lines on the side of my face, to draw topology on my ear and run the lines off down to my shoulders. The new modified image was then imported as before into 3DS Max as an updated reference.
Revised Topology:
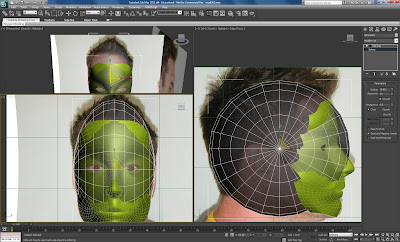
In order to create the head extension a sphere was created from the shapes modifier, rotated 90 degrees, scaled down and roughly positioned over my head. (again alt x can turn on transparency mode to help here)
Sphere added:
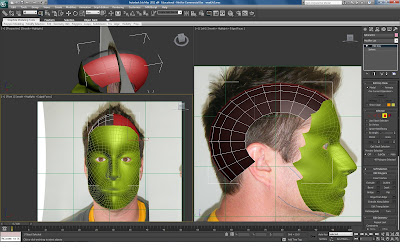
Here I tried to match up the lines of the sphere with my topology lines and adapted the sphere to the size and shape of my head. The Paint selection is then used like a little spray can which allows us to remove geometry which will not be needed by holding down ctrl and spraying the can.
The end result is hopefully a nice curved semi circle at the top of the head.
Soft selection was used on the last vertex to help push the sphere into shape and line it up correctly in preparation to attaching it to the face. It also gives the effect that the lines smoothly taper off the head.
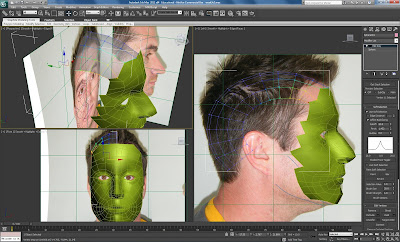
(I didn't actually import my new photoshop file until this point as you will see on further drawings - but method explained above)
Once I felt that I had lined up the head piece successfully I was ready to attach it to my face again using the snap tool, matching up the vertices of the head with the existing lines on my face. I began to create polygons to make up the rest of my head to replicate the quads on my topology image.
At this stage I discarded the ear momentarily.
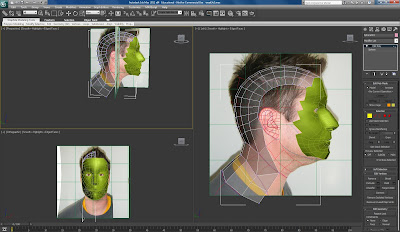
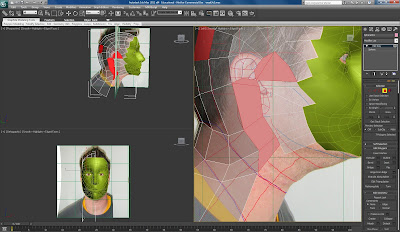
Once happy that my head and neck portion had been created fully, keeping my flow lines accurate and matched up to the lines on my face, it was time to attach the head to the face. This can be done within edit polygon - edit geometry - attach, then welded all the head vertices to the face.
In order to test if all of the vertices had been welded, I just pulled around the points a bit.
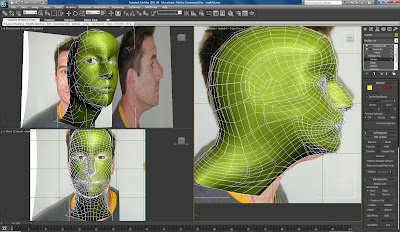
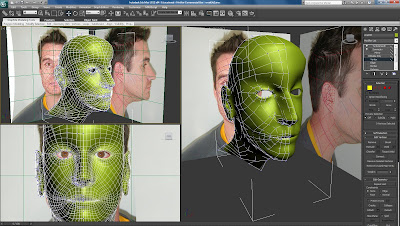
I turned on turbosmooth again to have a look at the detail in my model and amended any slight changes to the vertices if there was any unsmooth areas from attaching the head.
Joining Head:
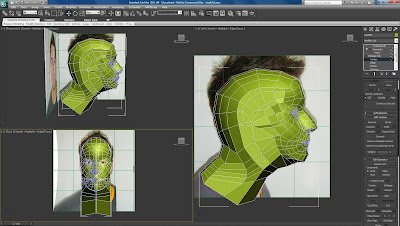
Turbosmooth of Full Head:
Ear Creation:
As mentioned above the ear topology was re-drawn and updated in 3Ds max as a reference.
During the head creation I left a space to accommodate the ear. The ear was created using the same method as the head, starting from scratch using the line tool drawing my quads.
Once my ear had been drawn into 3Ds it was converted into an editable poly, attached and positioned in relation to the reference plane. The individual vertex points were stretched and manipulated to match the ear.
Ear Spline Creation:
Ear Converted to Poly:
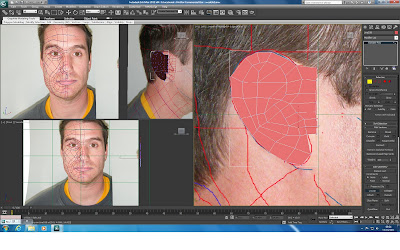
For the more detailed areas within the ear; the ear canal and the ridges, edge selection was used to select parts and the chamfer technique was used to create indented portions and depth.
The vertices were moved around again to match the topology of the ear and I found it helpful while doing so to turn on turbosmooth periodically to see the development of the ear.
More Detail:
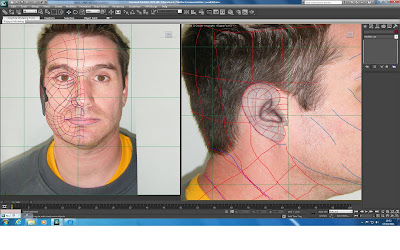
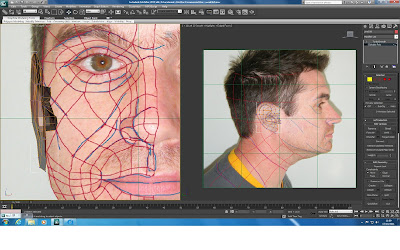
Once I was satisfied with the general depth and structure of my ear it was ready to think about attaching it. In order to do so, a select few polygons were removed from the head section where the ear would go.
So, the ear was selected and set into isolation mode using (alt+q), using the edge tool I selected the back edges of the ear using loop and made it thicker by holding shift, to imitate the thickness from the reference.
I then attempted to simplify the edges on the ear, creating polygons behind the ear to match up with the lines on the head, used vertex mode and the snap tool to move the vertices and dragged the points matching them up, clicking on the head attaching and welding to the ear to ensure that the ear becomes part of the head.
Ear Ready to Attach:
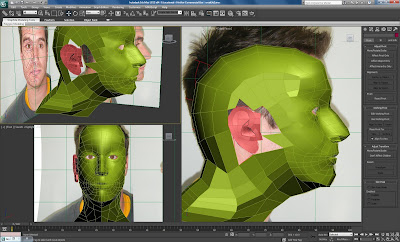
My Head:
No comments:
Post a Comment