Symmetry:
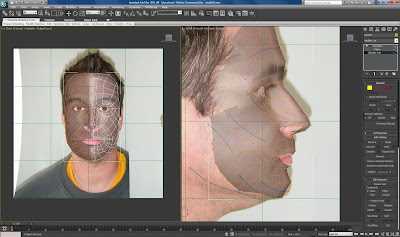
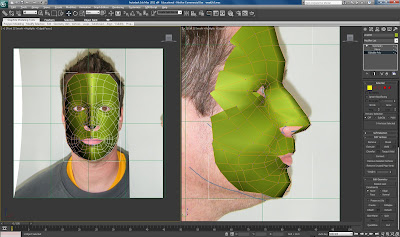
So far I have only been working on the Left side of my face. Once happy with the definition and smoothness of the model so far I began considering the other half of the face.
Thankfully this can be achieved reasonably simply in 3DS Max by applying 'symmetry' in the modifier panel . I ticked flip to flip the face and clicked the plusses by symmetry and mirror which allowed movement of the new side of the face.
I carefully lined up the two sides of the face right in the centre ensuring not to overlap at all, attempting to keep it aligned and make sure all of the curves and edges were still as smooth as possible.
Symmetry Images:
Smoothing & Refining:
Now I started to look at my mesh with the turbosmooth modifier applied which helps give the contrast of your mesh as a completely smoothed out object and adds subdivision.
It is a good gauge to use toggle on and off while refining the finer detail in your model.
So, my face was in reasonably good shape. I moved around the vertices a bit more after the face had been smoothed just to iron out any visible lumps, or curves that needed to be sorted out.
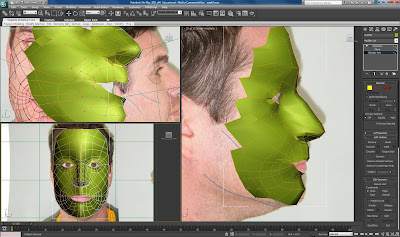
This is where more detail and time is needed to be taken over the more intricate areas of the face. The nose, lips and eyes.
The nose took me quite a long time to get right.
I selected edge mode within the editable poly preferences to select the outer edges of the nostrils, held shift and dragged out more edges building up the nostril area. I used weld to connect to the new vertices the edge of the nose. I selected the vertical edge around the nostril and used connect edges to create a new set of segments. I deleted the edge which was near ther tip of my nose and used the cut tool to join the new segments vertex to the tip of the nose. Toggling between vertex and edge mode allowing me to space them out nicely.
The nostril was achieved by creating a polygon and extruding it inwards, modifying the height to create a cavity.
Again, building up my nose while attempting to keep a nice flow in the vertices.
Nose:
Nostrils:
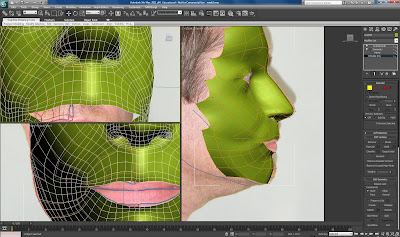
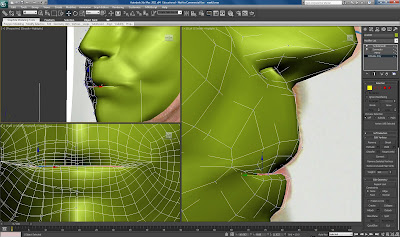
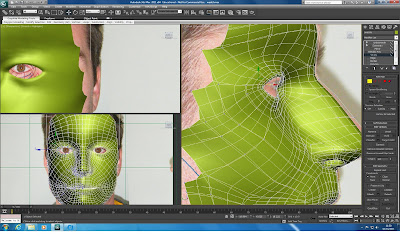
The lips and eyes were modified in the same manner. Using the same technique as above creating edges and moving them into place keeping an eye on the front viewport to create the shapes, while spacing them out correctly in the left viewport.
Lips:
Eye:

Turbosmoothed at end of this stage:
No comments:
Post a Comment