Adding Depth and Volume:
In this step of the process we begin to create a 3D object from our surface.
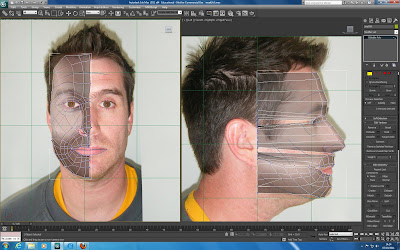
Essentially what is done here is that all the vertices are dragged out in correspondance to where they should be on my side image.
We are trying to create an accurate model and it is quite important to try and follow the topology flow while trying to recreate our face.
I began this process by selecting the whole line of vertices closest to the center of my face. Then began to pull out the vertices using the x axis in order to attempt to align them with where they should be with respects to the profile image. In essence trying to match up my face.
I found it helped to use transparency (alt+x) to make it a little easier to see what I was doing through this process.

This is quite a long process which requires a little patience in order to get right. I found it a little frustrating, though when I got lost I could just select a single vertex point and find my place again. It was important to try to work from Right to Left trying to keep the flow lines consistent to my reference picture.
Basically this process was repeated, working through all rows until I had pulled out all of the vertices in my face, attempting to create the depth within my surface. Pulling out vertices and matching them up with where they should be on the picture while trying not to overlap lines to keep a smooth feel to our mesh curves and trying to keep consistent with my topolgy.
A lot more care was taken in the trickier areas such as the eye sockets to ensure that I wasn't overlapping shapes.
This process was quite lengthy for me and I had to spend a lot of time flicking between both viewports, zooming in and out of my images ensuring i was keeping my curve structure as close as possible to my topology blueprint.
Some screenshots of this process:


It can be helpful to turn off transparency view to gain a perspective in what your mesh is looking like throughout this process:

Pretty Much There:


No comments:
Post a Comment